

A plumbing rough-in is the absolute foundation of your home's entire plumbing system. It's that critical phase where all the water supply pipes, drain lines, and vents are run through the walls, floors, and ceilings before a single piece of drywall goes up. This plumbing rough in guide is your roadmap to getting it right the first time. Honestly, a flawless rough-in isn't just a goal; it's non-negotiable for a reliable, code-compliant home.
Why Your Plumbing Rough In Is So Crucial
Think of the plumbing rough-in as the hidden skeleton of your home's water system. It’s the complex web of pipes, drains, and vents we install when the framing is still exposed. This isn't just some other item on the construction checklist—it's the single most important phase for ensuring decades of trouble-free plumbing.
A small mistake here, like a drain line with a poor slope, might seem minor now. But years down the road, it could mean tearing up concrete floors and spending thousands on a completely avoidable repair. Getting the rough-in perfect from the start protects your investment, guarantees your project will pass inspection, and prevents the kind of catastrophic failures that turn a dream build into a total nightmare. For homeowners and builders here in North Carolina, solid planning at this stage is everything.
The Backbone of Modern Sanitation
The importance of well-planned plumbing isn't some new idea. The story of America's infrastructure really drives home why we have such strict standards today. The first underground sewer was actually built in New York City way back in 1728, but it took over a century for people to truly connect the dots between proper sanitation and public health. That realization kicked off the creation of the standardized plumbing codes we follow today.
It's a powerful reminder of why a meticulous rough-in is essential for modern construction. If you're interested, you can read more about how plumbing has evolved over the centuries to see why these steps are so critical.
The plumbing rough-in is where the real functionality of your home is decided. You can always change fixtures and repaint walls, but the pipes hidden inside them are practically permanent. A flawless rough-in means a home that just works, for life.
Core Components of a Plumbing Rough In
To really get a feel for its importance, you need to know the main parts of a rough-in. Each piece has a specific job, and they all have to work together perfectly.
Before we dive in, here’s a quick overview of what we’re talking about:
Plumbing Rough In At a Glance
| Component | Function & Key Consideration |
|---|---|
| DWV System | Carries all wastewater away from your home. The slope is the most important detail here. |
| Water Supply Lines | Delivers clean hot and cold water to fixtures. Must be leak-proof and properly secured. |
| Vents | Allows air into the drain system to ensure smooth flow and vent sewer gas. Must terminate correctly outside. |
Each of these systems needs to be installed with care and precision.
Breaking Down the Components
Drain, Waste, and Vent (DWV) System: This is the network of larger pipes (usually PVC) that carries wastewater and sewage away from your sinks, showers, and toilets. The single most critical factor here is getting the slope right—typically 1/4 inch per foot—so gravity can do its job without any help.
Water Supply Lines: These are the smaller pipes (we often use PEX or copper) that deliver clean hot and cold water to all your fixtures and appliances. They have to be installed to withstand constant pressure and, most importantly, prevent leaks.
Vents: Vents are the unsung heroes of your plumbing system. These pipes run from the drain lines all the way up through the roof. They let air into the DWV system, which prevents the vacuum effect that causes gurgling toilets and slow drains. They also provide a safe path for sewer gases to escape outside.
Mistakes in any of these areas can cause big headaches. For example, improper venting is a classic cause of slow drains and those weird gurgling sounds. A hidden leak in a water supply line can lead to serious water damage and mold. That’s a huge concern in humid climates like ours in North Carolina, where moisture problems can get out of hand fast. It all comes back to a perfect rough-in, which is why we're so serious about addressing common crawl space moisture problems before they even start.
Translating Blueprints Into a Functional Plumbing Layout
This is where the real work begins—and where a good plumber proves their worth. You're moving from a flat architectural drawing to a real-world plumbing map. It's one of the most critical parts of the job. You'll be figuring out the exact paths for every drain line, water supply pipe, and vent stack, essentially turning a 2D plan into a functional 3D system.
The planning and layout phase is honestly the most important stage of any rough-in. Mistakes here are a nightmare. They can lead to incredibly expensive fixes, sometimes even forcing you to break up a brand-new concrete slab to correct a misplaced pipe. Federal regulations also come into play, setting standards like limiting showerheads to 2.5 gallons per minute and keeping water velocity under 8 feet per second to prevent noisy pipes and corrosion. Getting this step right is what protects your budget and ensures the system works reliably for decades. You can explore more about these critical plumbing phases to see why we obsess over the details here.
From Paper to Pipes
Your first job is to visualize how all the pipes will actually run through the walls, floors, and ceilings. Think of it like drawing a road map for water and waste. You have to find the most direct and efficient routes from the main sewer line and water supply to every single fixture.
A perfect example is a bathroom designed with a wet wall—where the sink, toilet, and shower are all clustered together. This is a plumber's dream. It's so much more efficient because all three fixtures can often share a single drain and vent system. That saves a ton of money on materials and labor compared to having fixtures scattered all over the room.
Takeaway: Always start by circling the fixture locations on your blueprint. The goal is to group them logically to keep pipe runs short, drill fewer holes in joists, and just make the whole system simpler and more reliable.
The entire process, from that first blueprint review to the final sign-off from the inspector, follows a clear path.
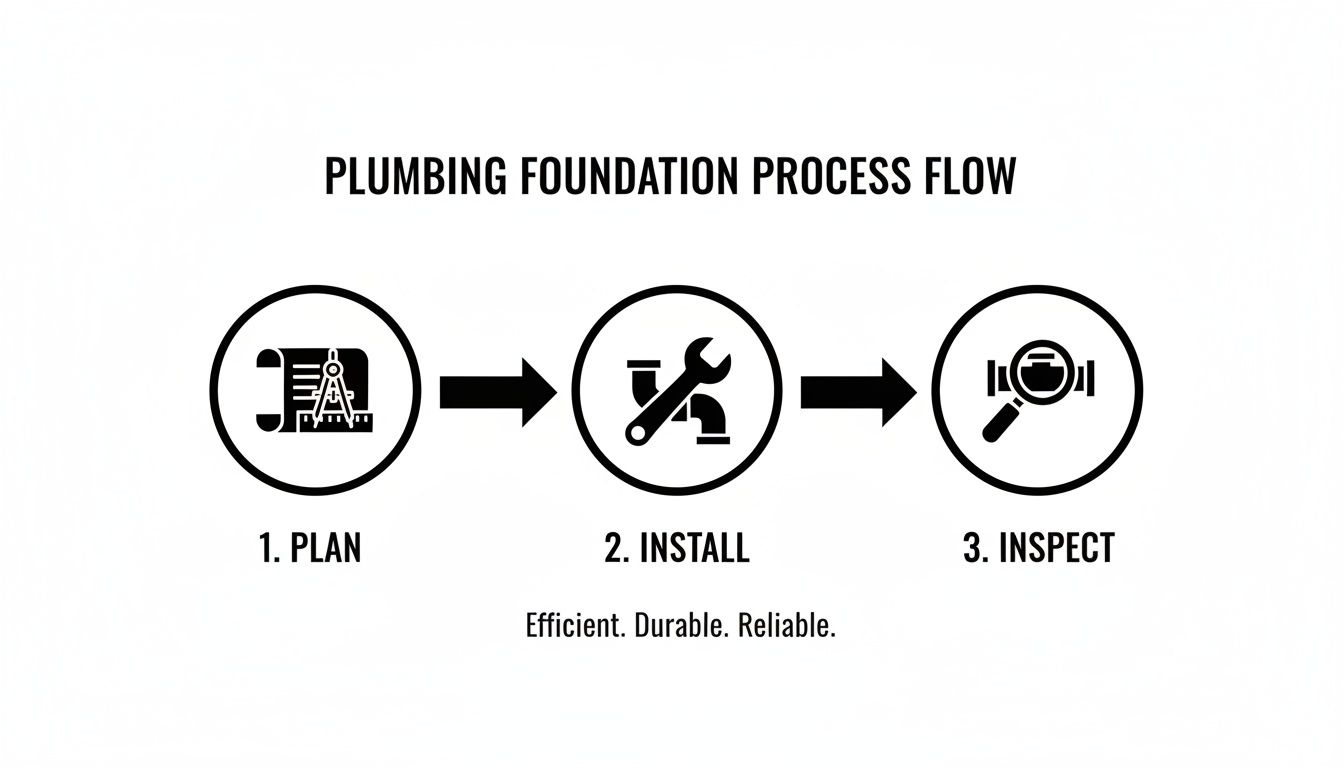
As you can see, a successful rough-in is all about careful planning, precise installation, and passing that final inspection.
Calculating Fixture Units for Pipe Sizing
Here's where things get a bit more technical. Figuring out the right pipe sizes isn't a guessing game. It's all based on a system called Drainage Fixture Units (DFUs). Every fixture in the house gets a DFU value, which represents the load it puts on the drainage system.
For example:
- A bathroom sink is usually 1 DFU.
- A modern toilet is about 1.6 DFU.
- A tub/shower combo is typically 2 DFU.
You simply add up the total DFUs for any group of fixtures, and that total tells you what size drainpipe you need. A single lavatory sink might only require a 1.5-inch pipe, but the main drain for a full bathroom will almost certainly need to be 3 inches, or even 4 inches, to handle the combined load without issues.
Undersizing pipes is a rookie mistake that guarantees slow drains and clogs. But going too big isn't the answer either. If a pipe is oversized, the water flow can slow down too much, leaving solids behind and causing its own set of problems. It's all about finding that Goldilocks size.
Real-World Layout Scenarios and Solutions
Theory is one thing, but on a real job site, you run into challenges that demand smart, practical solutions.
Scenario 1: The Tricky Kitchen Island Sink
Everyone loves a kitchen island with a sink, but venting it can be a headache. You can't just run a vent pipe up through the middle of the ceiling. So, you have a couple of solid options:
- Air Admittance Valve (AAV): Also known as a "studor vent," an AAV is a clever one-way valve. It opens to let air into the pipe when a fixture drains and then closes to block sewer gas from coming out.
- Island Loop Vent: This is the old-school, tried-and-true method. It involves running the vent pipe up high inside the island cabinet, looping it back down, and then connecting it to the main drain line.
AAVs are definitely easier to install, but some local codes here in North Carolina can be picky about where you can use them. I always tell people to check with their local building inspector before committing to one.
Scenario 2: The Basement Bathroom
Putting a bathroom in a basement is a classic challenge because the fixtures are below the home's main sewer line, so gravity is working against you. The go-to solution is an ejector pump. It collects waste in a sealed basin, and when the basin fills, the pump kicks on and sends everything up to the main drain line. This requires careful planning—you need to figure out the best spot for the pit and make sure you have the right electrical supply ready to go.
Essential Tools and Core Principles of Pipe Installation
Once you have a solid layout, it’s time to get your hands dirty. A successful plumbing rough-in really comes down to two things: having the right tools for the job and knowing the core principles of pipe installation. This is where precision is everything, since the pipes you run today will be hidden behind walls for decades.
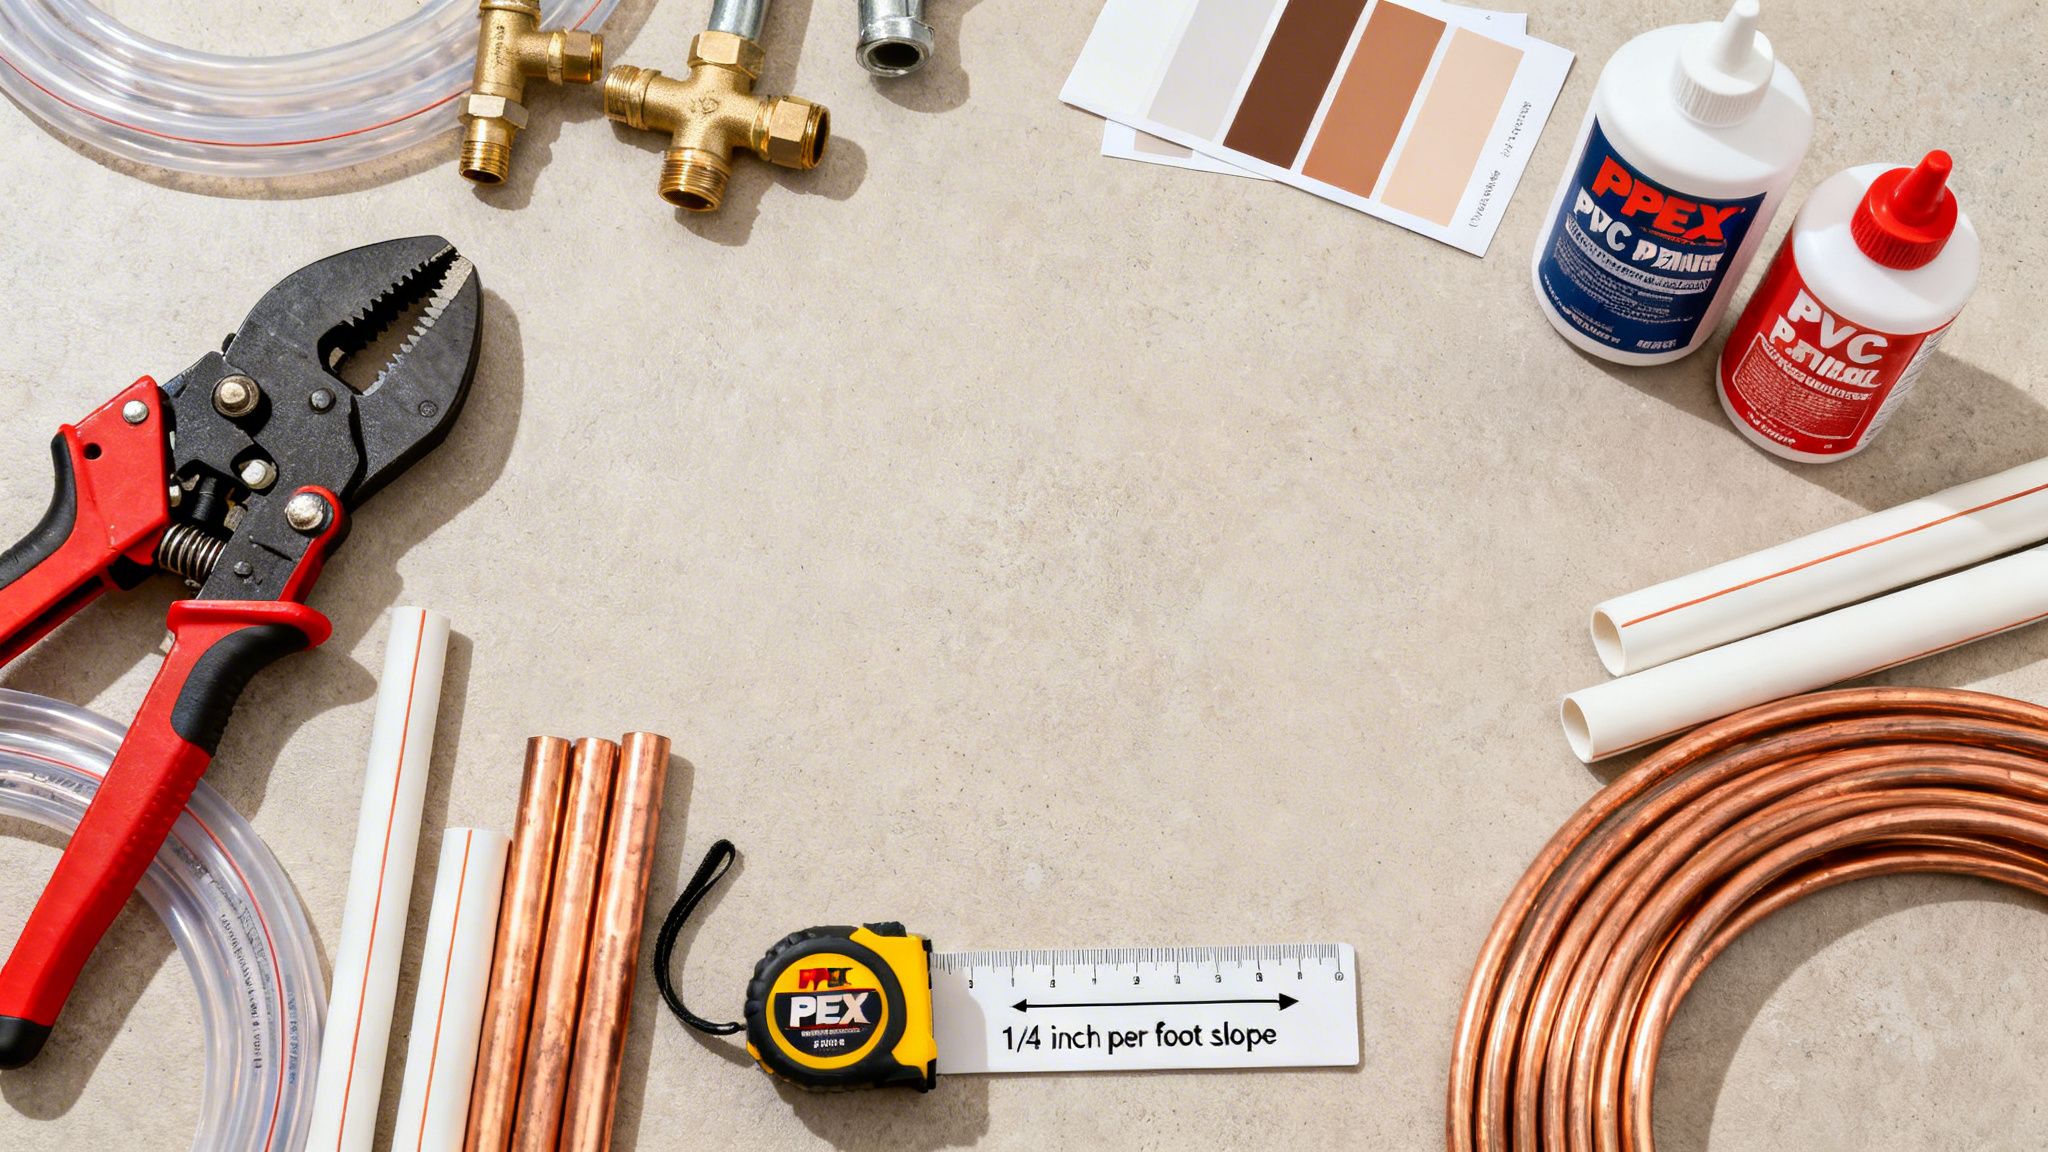
To execute your plan, you need the right gear. You don't need a whole warehouse of equipment, but a few specialized tools are non-negotiable if you want to do the job correctly and efficiently.
Assembling Your Rough In Toolkit
Having the right tools is the difference between a smooth project and a frustrating one that ends in leaks. Your basic toolbox with a hammer, tape measure, and level is a given, but a proper rough-in demands more specific equipment.
Here’s what your essential list should look like:
- PEX Tools: If you’re going with PEX, you’ll need a dedicated pipe cutter for clean cuts and the correct crimping or expansion tool for your chosen fitting system (PEX-A, PEX-B, or PEX-C).
- PVC/ABS Tools: For the drain lines, a saw for cutting plastic pipe is a must. You'll also need primer and cement that are specifically rated for the material you’re using. Don't mix and match brands or types.
- Drilling and Cutting: A powerful drill paired with a set of self-feed bits or hole saws is necessary for running pipes through studs and joists. A reciprocating saw is also invaluable for any demo work and notching.
- Pipe Wrenches and Channel Locks: You can't do plumbing without them. They're essential for tightening all sorts of fittings and making adjustments on the fly.
A common mistake we see is using the wrong tool for the job, like using a hacksaw for a PEX pipe. This creates a rough edge that can damage the fitting's O-ring and cause a slow, hidden leak down the road. Always use a dedicated PEX cutter.
Choosing the Right Pipe Material
Selecting the right material is a critical decision. You'll be installing two main systems—water supply and DWV (Drain, Waste, and Vent)—and each requires a different type of pipe with its own unique properties.
For your water supply lines, the main choices are:
- PEX (Cross-Linked Polyethylene): This flexible plastic tubing has pretty much become the industry standard for residential supply lines. It’s freeze-resistant, way easier to install than copper, and doesn't corrode. Its lifespan is often cited at 40-50 years.
- Copper: The traditional choice. It’s incredibly durable and has natural antimicrobial properties, but it requires soldering, which definitely takes more skill. It's also significantly more expensive than PEX.
For your Drain, Waste, and Vent (DWV) system, you'll be working with either:
- PVC (Polyvinyl Chloride): The familiar white plastic pipe used for most residential drain lines. It's strong, inexpensive, and easy to join with primer and cement.
- ABS (Acrylonitrile Butadiene Styrene): A black plastic pipe that works much like PVC but is joined with a one-step cement process. Often, your local codes will dictate which one you can use.
The Golden Rules of Pipe Installation
Once your tools and materials are ready, success hinges on following a few non-negotiable rules. These principles make sure your system works right and doesn't compromise your home's structure.
The most famous rule governs your drain lines: a minimum slope of 1/4 inch per vertical foot is required. No exceptions. This slope ensures gravity can do its job and effectively pull water and solids toward the sewer line, which is your best defense against clogs. A bubble level and a tape measure are your best friends here.
Properly securing your pipes is just as important. Water supply lines must be supported every 32 to 48 inches to prevent them from moving and making noise. Horizontal drain lines need support at least every 4 feet to keep them from sagging, because any low spots become a perfect place for clogs to form.
Finally, be careful when drilling through framing. Any holes in joists should be in the center third of the board's height. If you have to notch the top or bottom, it should be no deeper than 1/6 the joist's depth. Cutting too aggressively can seriously compromise the structural integrity of your floors. In some cases, poor installation practices can also create environments ripe for moisture issues. To understand how moisture can affect your home’s foundation, check out our article explaining the benefits of crawl space encapsulation. Sticking to these guidelines helps you create a plumbing system that is not only functional but also safe and built to last.
Navigating North Carolina Inspections and Avoiding Common Pitfalls
Passing your rough-in inspection is the true finish line for this phase. It’s that moment an independent inspector verifies all your hard work is safe, up to code, and actually works. We're going to demystify that process, especially focusing on North Carolina requirements and the common slip-ups that can trip up even seasoned pros.
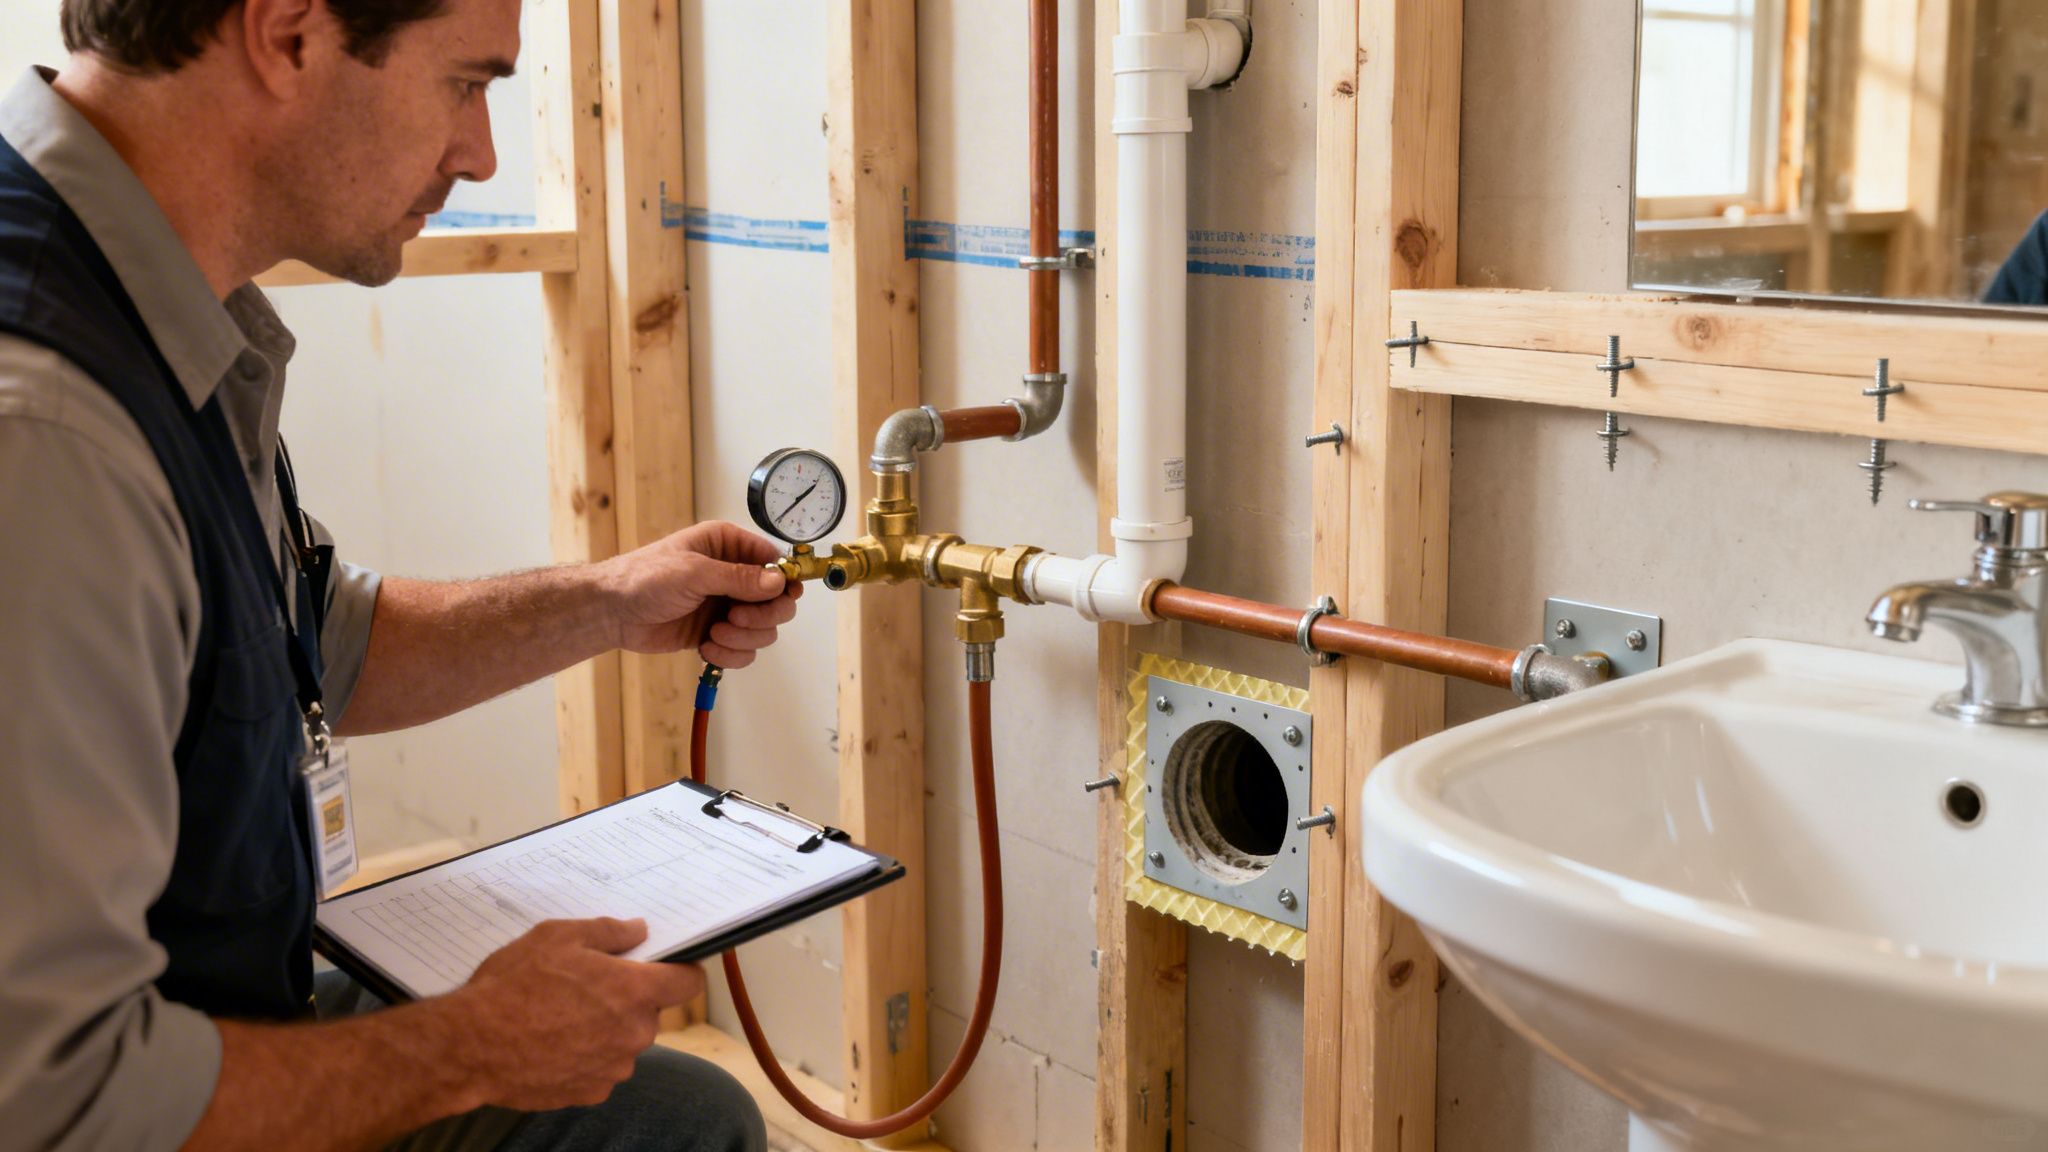
Getting through this stage without a hitch means knowing exactly what the inspector is looking for before they even pull into the driveway. In North Carolina, they aren't just giving your pipes a quick glance; they’re meticulously checking every joint and measurement against the state's specific plumbing code.
The Inspector's Checklist: What They Scrutinize
When an inspector arrives, they have a mental checklist of critical items they’re going to zero in on. Your job is to make sure every single one is perfect.
Here are a few things they always look for:
- Correct Vent Terminations: All your vents need to terminate properly. That usually means extending at least 6 inches above the roofline and being located a safe distance from windows or air intakes. Nobody wants sewer gas wafting back into the house.
- Strategic Cleanout Placements: Inspectors will hunt for accessible cleanouts. They'll verify you’ve put them in at required intervals and at every major change of direction to make future snaking and maintenance possible.
- Nail Plate Installation: This is a big one. They'll look for steel nail plates protecting pipes wherever they run through studs. This is especially crucial in walls where drywall screws or a stray nail could easily cause a puncture down the road.
Beyond these visual checks, the single most important part of the inspection is the pressure test. It's non-negotiable and the only way to prove your water supply lines are 100% leak-free.
A failed inspection isn't just a slap on the wrist. It means costly delays, ripping out finished work, and throwing your project timeline into chaos. The goal is always to pass the first time by building to code from the very beginning.
Performing Mandatory Pressure Tests
In North Carolina, you must test your water supply system under pressure to prove it's watertight. You can use either water or air for this, and both are acceptable as long as you do it right.
Water Pressure Test:
For this test, you'll cap off all the stub-outs where your fixtures will eventually go. Then you fill the entire system with water and hook up a pressure gauge. You pressurize the system to a specific level—often around 100 PSI—and let it sit. It has to hold that pressure for a set amount of time, usually 15-30 minutes, without the needle on the gauge dropping one bit.
Air Pressure Test:
The air test works on the same principle, but you use an air compressor to fill the lines with pressurized air instead of water. This is a great option in colder months when you can't have water sitting in pipes in an unheated house. You might see a tiny pressure drop as the air temperature inside the pipes stabilizes, but any significant, steady loss means you’ve got a leak somewhere.
A pressure test is the ultimate report card on your workmanship. A single leaky fitting that you’d never spot with the naked eye will reveal itself instantly on that gauge.
Common Rough-In Failures and How to Avoid Them
Over the years, we've seen the same handful of mistakes sink an otherwise decent rough-in. The good news? They are all completely avoidable with a little extra care. Knowing what these common errors are is the first step in building a solid construction quality control checklist for all your projects.
These aren't just minor slip-ups; they are code violations that will earn you a red tag and a re-inspection fee.
To help you avoid that, here’s a quick look at some frequent issues we see and how to get them right the first time.
Common Rough-In Failures vs. Code-Compliant Fixes
Below is a table that breaks down some of the most frequent inspection failures we encounter and the correct methods to ensure your work is compliant.
| Common Mistake | The Code-Compliant Solution | Why It Matters |
|---|---|---|
| Improper S-Traps | Use a proper P-trap with a vent. | S-traps are notorious for siphoning water from the trap, which breaks the water seal and allows nasty sewer gas to enter the home. They are prohibited by code. |
| Inadequate Slope | Maintain a minimum slope of 1/4 inch per foot for all drain lines (and 1/8 inch for 4-inch or larger pipes). | A pipe that’s too flat—or worse, reverse-sloped—won’t drain. It’s a guaranteed recipe for clogs, backups, and unhappy homeowners. |
| Unprotected Pipes | Install nail plates on the face of studs where pipes pass through them. | This simple, cheap piece of metal is the only thing stopping a future homeowner from accidentally driving a nail or screw into a water or drain line. |
Paying attention to these details isn't just about passing an inspection. It’s about building a plumbing system that is safe, reliable, and built to last. It’s a mark of quality that protects everyone involved from major headaches for years to come.
When to DIY and When to Hire a Professional
It’s the big question every ambitious homeowner asks themselves: "Can I handle this plumbing rough-in myself?" The answer is a definite "maybe," but it really boils down to the scale of the job and your actual, honest-to-goodness skill level. A plumbing rough-in isn't like painting a bedroom or swapping out a light fixture; a mistake here isn't just a cosmetic flaw—it can be a catastrophic and incredibly expensive mess to fix down the road.
A very small, straightforward project might fall into the DIY category for a seriously skilled individual. Think about adding a single utility sink in an open basement, where you have wide-open access to the existing drain and supply lines. If you've got real experience cutting and joining pipes, you truly understand drainage slope, and you can confidently navigate your local codebook, then a job like that could be within your grasp.
But the moment the scope creeps up, the risk skyrockets. Even a project that seems simple on the surface, like a small bathroom addition, involves a complex web of vents, multiple fixtures fighting for drainage, and a whole lot of precise math. One wrong connection, one miscalculation on a vent stack, and you can create a world of plumbing headaches for yourself.
Evaluating the Risks of DIY Plumbing
Going it alone on a rough-in might look like a great way to save some cash upfront, but the potential downsides are massive. This is one of those home improvement areas where "winging it" can lead to consequences that completely wipe out any initial savings.
Here are the most common traps you can fall into:
- Code Violations and Failed Inspections: Plumbing codes are no joke, and they change from one town to the next. A professional plumber lives and breathes these rules. A DIY job that misses a required cleanout, uses the wrong type of vent, or gets the pipe slope off by a fraction of an inch will fail inspection. Period. That means project delays and, in the worst-case scenario, tearing out finished walls to start all over.
- Hidden Leaks and Water Damage: Even a pinhole leak from a joint that wasn't perfectly sealed can go unnoticed for months, or even years, behind drywall. By the time you spot that telltale water stain on the ceiling, you could be staring down thousands of dollars in damage from rot, mold, and even structural decay. A pro's work is pressure-tested and guaranteed to be watertight.
- Lack of Warranty and Accountability: When you're the plumber, you're also the warranty department. If a pipe bursts two years later because of a faulty connection you made, all those repair costs—and the water damage cleanup—are on you. A professional contractor stands behind their work.
Ultimately, this decision is all about risk versus reward. Saving a few thousand dollars is tempting, I get it. But the potential cost of a failed DIY rough-in, both in dollars and sheer stress, is often so much greater. Think of a professional plumber's fee not just as an expense, but as an investment in safety, compliance, and your own peace of mind.
When a Professional Is Non-Negotiable
For most projects that go beyond a single, simple fixture, hiring a licensed professional is really the only smart play. And there are certain situations where bringing in a pro isn't just a good idea—it's absolutely mandatory.
You must hire a licensed plumber for:
- New Home Construction: A whole-house plumbing system is an intricate network. It requires a master plan, deep knowledge of the codes, and the seasoned experience to execute it flawlessly from the slab up.
- Major Renovations and Additions: Any project that involves multiple wet rooms (like a kitchen and two bathrooms) or requires moving entire plumbing stacks is far too complex for a DIY attempt.
- Work Involving Concrete Slabs: If you need to install or move drain lines underneath a concrete slab, that’s a job for specialized equipment and expertise. You have to trench correctly without compromising the home's foundation.
- Projects Requiring Ejector Pumps: Putting a bathroom in a basement that sits below the main sewer line means you'll need an ejector pump system. This is a complex mechanical and plumbing install that has to be done perfectly to prevent disastrous sewage backups.
Here in Southern North Carolina, partnering with an experienced, licensed contractor like FHP Contracting is your best bet for ensuring the project meets all state and local codes. Our team knows the specific requirements for this region, from soil conditions to the nuances of what local inspectors look for. When you work with us, you aren't just getting pipes installed; you're getting the assurance of a one-year workmanship guarantee. We take full accountability for building a system that's safe, efficient, and built right the first time. For more guidance on finding the right partner for your project, our guide on how to choose a general contractor offers some valuable insights.
Your Plumbing Rough-In Questions, Answered
Even with the best guide in hand, a few questions are bound to pop up when you're staring down a plumbing rough-in. It's a complicated job, and you're smart to get answers before you start cutting into concrete or drilling through studs. We've pulled together some of the most common questions we hear from homeowners and builders to give you some quick, straight-talk answers.
This should help clear up some of the finer points, from timing to what this is all going to cost, so you can move ahead with your project confidently.
How Much Does a Plumbing Rough-In Cost?
This is always the first question, and the honest answer is: it really depends. For a pretty standard three-piece bathroom in a basement, you can expect the rough-in plumbing to cost somewhere between $1,500 and $4,000. The final number on the invoice hinges on a few key things.
The complexity of the job is the biggest factor. A project that demands a lot of concrete cutting and an ejector pump is naturally going to be on the higher end compared to a simple tie-in to existing drain lines. The number of fixtures you're adding and the going labor rates in your area will also move the needle.
How Long Does a Plumbing Rough-In Take?
Time is money on any construction site, so this is another big one. For a typical bathroom addition, a professional crew can often get the entire rough-in done in just one to three days. For instance, if we're just moving a single shower valve and swapping old copper lines for new PEX, a two-person team can knock that out in a few hours.
A full-house rough-in for new construction, however, is a different beast entirely. That can easily take a week or more, depending on the size of the house and how intricate the plumbing layout is. The real key here is proper sequencing with the other trades to keep everything flowing smoothly.
Pro Tip: Never, ever schedule your drywall guys until after the plumbing rough-in has passed its inspection. A failed inspection can throw a major wrench in your timeline, and you definitely don't want to be paying crews to reschedule.
What Is Included in a Plumbing Rough-In?
Think of the rough-in as setting the stage for all your fixtures before the walls get closed up. It's a comprehensive process where we install all the behind-the-scenes components that have to work together perfectly.
A complete rough-in package involves:
- Drain Lines: All the PVC or ABS pipes designed to carry wastewater away from every sink, toilet, and shower.
- Water Supply Lines: The PEX or copper lines that will deliver hot and cold water to each and every fixture.
- Vent Pipes: The critical system that lets air into the drains for smooth flow and, more importantly, routes nasty sewer gases safely up and out of your home.
This phase also covers setting the toilet flange and installing the drain for the shower or tub. It's essentially getting everything ready so that your fixtures can just be "plugged in" during the final trim-out phase of the project.
Do I Need a Permit for a Plumbing Rough-In?
Yes. The answer is almost always a firm yes. Any time you're adding or making changes to your home’s plumbing system, you're going to need a permit from your local building department. This isn't just about paying fees or dealing with bureaucracy; it's a non-negotiable safety measure.
Pulling a permit means a qualified inspector will come out to verify that all the work meets current building codes. This is what protects you, your home, and any future owner from the headaches and dangers of bad plumbing—think leaks, sewer gas exposure, or even structural problems. A licensed plumber will take care of the entire permitting process for you.
Whether you're tackling a small remodel or building from the ground up, getting the rough-in right is everything. The crew at FHP Contracting has been at this for over 13 years, making sure plumbing systems across Southern North Carolina are safe, up to code, and built to stand the test of time.
Ready to start your project without the guesswork? Contact us for a free consultation. Let our team build your vision with the clarity and accountability you deserve. You can learn more about our services over at https://fhpcontracting.com.