

Before the drywall goes up and the paint goes on, your house is just a skeleton of wooden studs. It’s at this exact moment that one of the most critical stages of construction happens: the electrical rough in. This is where electricians lay the entire groundwork for every light, switch, and outlet you'll ever use in your home.
Think of it as installing the building's nervous system. It’s all the complicated, behind-the-scenes work that makes everything else possible.
Your Guide to the Electrical Rough In

If you've ever walked through a home under construction, you’ve seen it—a web of wires and plastic boxes that seems to make no sense. That's the rough-in. It’s when licensed electricians methodically place and connect all the unseen parts that will eventually power your life. It’s a messy, technical, and absolutely essential job.
During the rough-in, the crew is focused on a few key tasks that all happen before the insulation and wall finishes are installed:
- Installing Electrical Boxes: Those blue, gray, or metal boxes you see nailed to the studs are the future homes for your outlets, light switches, and fixtures.
- Running Wires: This is the big one. Electricians pull what feels like miles of electrical cable (often a brand like Romex) through holes drilled in the studs and joists, connecting the main panel to every single one of those boxes.
- Setting Up the Panel: The breaker box, or main service panel, gets installed. This is the command center for your home's entire electrical system.
The rough in isn't just another step on a checklist; it's the fundamental blueprint for a safe and functional electrical system. Getting this stage right is non-negotiable for passing inspections and ensuring you don't have problems years down the road.
The Two Main Electrical Phases
To really get what a rough-in is, it helps to compare it to the next major electrical stage: the "trim out" or "finish" phase. The rough-in is all about infrastructure hidden in the walls. The trim out is about installing the pretty, functional parts you see and touch every day.
The level of planning that goes into a professional rough-in is intense, especially for a complex project. It’s a core part of the process you’ll find when building a custom home.
The difference between the two phases becomes crystal clear when you look at the specific tasks. Rough-in work happens when the walls are open and it's all about structure. Trim-out work happens much later, after the painting is done, and it's all about precision and clean finishes.
Comparing the Electrical Rough In and Trim Out Phases
This table breaks down the jobs performed during the two main electrical phases. You can see how one sets the stage for the other.
| Component | Rough In Phase (Behind the Walls) | Trim Out Phase (Visible Finishes) |
|---|---|---|
| Outlets & Switches | Install boxes; run wires to box locations. | Install the actual receptacles and switches. |
| Lighting | Mount junction boxes; run wiring to fixture points. | Install and connect light fixtures, chandeliers, and ceiling fans. |
| Main Panel | Install the breaker panel; connect main service line. | Install and label individual circuit breakers. |
| Final Touches | Wires are left coiled inside boxes. | Install faceplates over all switches and outlets. |
Basically, the rough-in gets all the power to the right spots, and the trim-out connects that power to the devices you actually use.
Understanding the Scope of Work
So, what actually happens during an electrical rough-in? Let's get behind the walls and look at what it really takes. This isn't just about yanking some wires through studs; it's the meticulous process of building the entire nervous system for your property's power. Done right, it’s a safe, reliable, and future-proof foundation for every light, switch, and outlet.
A pro contractor’s job is so much more than just connecting two points. It's a precise sequence of tasks where every single step builds on the last.
The Core Components of a Rough-In
Think of it like constructing a miniature power grid inside your home's skeleton. It all happens in a very specific order.
Placing the Boxes: Long before a single wire is pulled, the electricians are busy nailing up electrical boxes. These plastic or metal containers are attached directly to the studs, marking the exact future home for every switch, outlet, and light fixture. Their placement isn't random—it's dictated by a detailed electrical plan and strict building codes.
Running the Wiring: This is the part of the electrical rough-in that most people picture. Electricians drill holes through the framing and pull miles of wire from the main panel location, creating electrical "highways" that feed the entire building. Each wire is carefully routed to its designated box, with a little extra coiled inside, ready for the fixture or device to be connected later on.
Installing the Main Panel: The main electrical panel—your home’s command center—is physically mounted in its permanent spot. The individual circuit breakers won't be installed just yet, but the heavy-duty service cable that brings power in from the utility pole is connected to the panel itself.
The Invisible Safety Net
One of the most critical, yet least understood, parts of a rough-in is the grounding system. This is, without a doubt, the project's most essential safety feature.
A grounding wire acts like an emergency exit for electricity. In case of a short circuit or power surge, it gives the excess voltage a safe, direct path into the earth. This protects your expensive electronics, but more importantly, it protects you and your family from the risk of a dangerous electric shock.
This means running a continuous copper ground wire to every single box and tying it all back to the main panel. That panel is then connected to long copper rods driven deep into the ground outside. You can bet an inspector will look at this system with a fine-toothed comb; it’s a non-negotiable safety requirement.
A seasoned general contractor knows these details are what make or break a project's safety and success. To understand how this fits into the bigger picture, take a look at our guide on how to choose a general contractor.
How to Time Your Electrical Rough In Perfectly
In any construction project, timing isn’t just important—it’s everything. And when it comes to the electrical rough in, that timing is non-negotiable. There's a very specific window where this work has to happen, and getting it right can make or break your schedule and budget.
This sweet spot happens right after the building’s frame is up, but before a single piece of insulation or drywall gets installed.
We call this the "open wall" stage. It’s when your electricians have a clear, unobstructed shot at every stud, joist, and cavity. This is their chance to run wires and set boxes exactly where they need to go without anything getting in their way. Trying to do this work at any other time is just asking for headaches.
The Ideal Construction Sequence
Getting the sequence right is a delicate dance. If the plumbers or HVAC crews get in there first and run ductwork right where your wiring needs to go, you've got a problem. On the other hand, if you jump the gun and put up drywall, you'll be tearing it down to fix something—a costly and frustrating mistake.
Any good contractor knows this rhythm by heart. Here’s how it should unfold:
- Framing Is Completed: The structural skeleton is built and gets the green light.
- Major Systems Rough-In: This is where the magic happens. Your plumbing, HVAC, and electrical crews come in, often coordinating their work side-by-side.
- Framing & Systems Inspections: A building inspector walks the site to verify all the behind-the-wall work meets code. This is a critical step.
- Insulation & Drywall: Only after passing inspection do the walls get closed up.
This is the point where an electrician is focused on installing all the fundamental components before the walls are sealed.
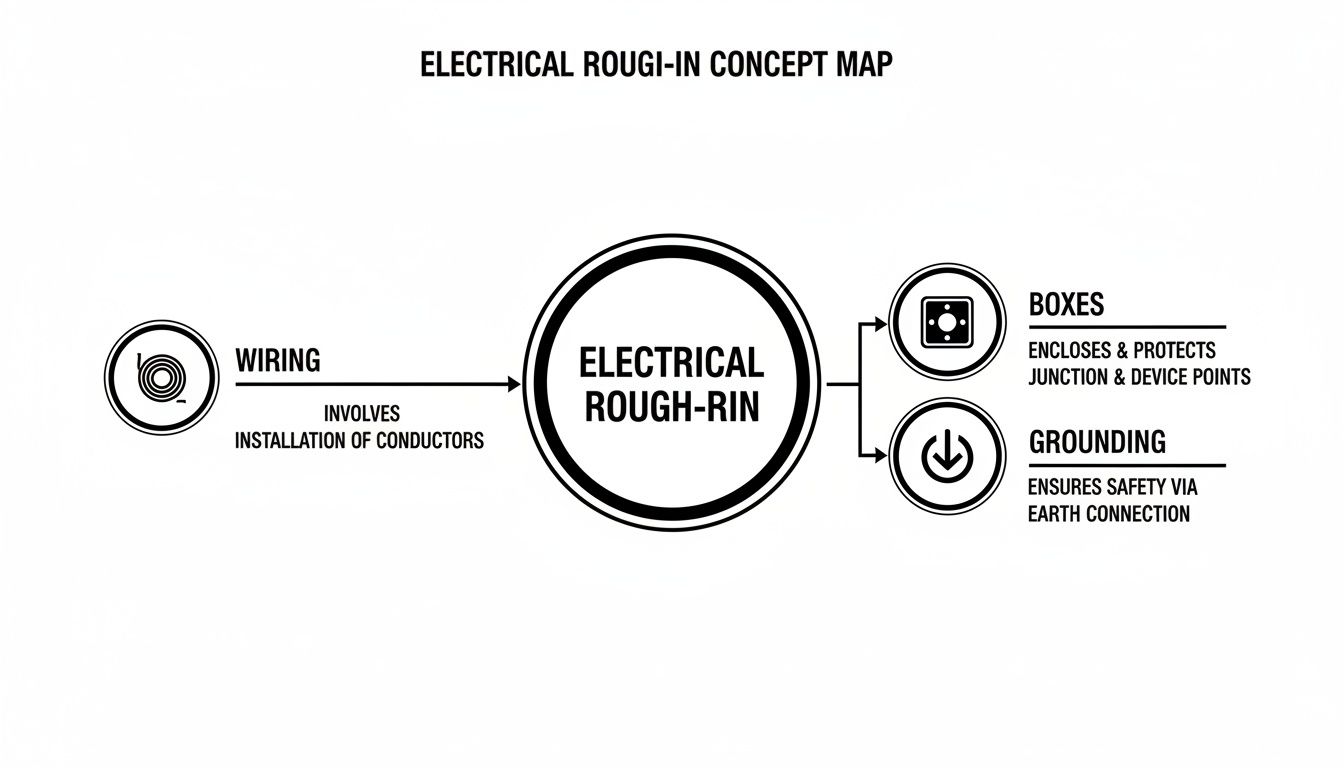
As you can see, it all comes down to getting the core wiring, boxes, and grounding in place so the project can move on to the next phase.
Estimating the Timeline
One of the first questions we always get is, "So, how long is this going to take?" While every job has its own quirks, we've gotten pretty good at estimating based on years of experience. A solid industry benchmark is that a skilled crew can rough-in a house at a rate of about one hour per 100 square feet.
This rule of thumb is especially handy when we're quoting custom homes and barndominiums across Southern North Carolina. It gives us a reliable baseline to work from.
Precise scheduling is more than a convenience; it's a core component of budget management. A project that stays on schedule avoids the cascading costs of delays, from extended labor fees to rescheduling subsequent trades.
Understanding this critical timeline helps you know what to expect and what to watch for as your project moves forward. In fact, our own construction quality control checklist is built around these milestones to make sure everything flows smoothly from one phase to the next.
Getting Through the Electrical Inspection (and Why It Matters)

The electrical rough-in inspection is a big milestone, and honestly, one of the most important checkpoints in any construction project. It’s easy to look at it as just another hoop to jump through, but it's better to think of the electrical code as a meticulously crafted safety manual. This isn't about red tape; it's about protecting your property and the people in it.
Passing this inspection is the official sign-off that your electrical system is solid right from the start.
When an inspector shows up to a job site here in North Carolina, they aren't there to make life difficult. Their job is to perform a crucial quality check, making sure every last wire and box meets strict safety standards before it all gets buried behind drywall forever. A failed inspection is a headache nobody wants—it means expensive rework and frustrating delays. That’s why knowing what they’re looking for is half the battle.
What Inspectors Look For
An inspector's eye for detail is incredible. They're checking dozens of things, but during a rough-in, they always zero in on a few key areas:
- Secure Wire Stapling: All those cables have to be properly stapled to the studs. There are specific rules for how far from a box a staple must be and how often they need to be secured along the run. It might seem picky, but this keeps the wires from getting nicked by a drywall screw or a future homeowner trying to hang a picture.
- Correct Box Placement: Electrical boxes need to be mounted at the perfect depth to sit flush with the finished wall. Too deep or too shallow, and your outlets and switches will look terrible and could be unsafe. They also check that the boxes aren’t jammed with too many wires, which is a major fire hazard from overheating.
- Proper Grounding: The inspector will verify that a continuous ground wire runs to every single box, light fixture, and outlet. This is that critical safety net we talked about earlier.
- Circuit Protection: They'll look for metal plates protecting wires where they pass through wood studs. This simple step prevents a stray nail or screw from piercing a live wire down the road.
A successful rough-in inspection is the ultimate proof of quality workmanship. It confirms that your contractor has not only followed the plan but has adhered to the non-negotiable safety standards that define a professional installation.
This commitment to safety shouldn’t just stop with the local codebook, either. We're always looking at what the best in the world are doing. For instance, European electrical systems often have even stricter rules and building practices that lead to superior safety.
By studying and adopting some of these advanced methods, we can deliver a system that's not just "up to code" but is fundamentally safer and more durable. If you’re curious, you can get a glimpse of these advanced safety standards in this video. This mindset of exceeding the baseline is what ensures a smooth inspection and a higher-quality home.
Managing Costs and Avoiding Common Mistakes
Getting your electrical rough-in right the first time is one of the single best things you can do to protect your project’s budget and schedule. I can't stress this enough. With electrical systems eating up a bigger and bigger chunk of project costs, any misstep during this phase can get very expensive, very fast.
On a modern commercial build, for example, it’s not unusual for electrical to account for 30 to 35% of the entire project budget. That's a huge number, and it shows just how much financial weight this stage carries. If you want a deeper dive into these numbers, you can watch this industry overview that breaks down the full scope of the costs.
All this to say, meticulous planning isn't just a good idea—it's a financial necessity. Avoiding the common pitfalls that lead to change orders and frustrating delays is the key to keeping your project on track.
The "We'll Figure It Out Later" Mistake
The most common and costly mistake I see is simply a lack of planning. Rushing into a rough-in without a detailed electrical plan is like trying to build a house without blueprints. It almost always leads to those dreaded last-minute changes—realizing an outlet is in the completely wrong spot or a critical light switch is missing.
These "on-the-fly" adjustments are always more expensive than just getting it right from the start. They force electricians to re-run wires, cut into freshly installed framing, and patch up work that was already considered done. It creates a domino effect of delays and piles on extra labor costs.
The Pitfalls of "My Cousin Vinny" Electricians
Hiring an unqualified or unlicensed electrician to save a few bucks is a classic case of being penny-wise and pound-foolish. I've seen it happen time and again. While their initial quote might look tempting, the hidden costs almost always come back to bite you.
An inexperienced crew is practically guaranteed to make mistakes that will get you a big red "FAIL" from the inspector. This opens up a whole can of worms:
- Costly Rework: The job has to be torn out and redone the right way to meet code. Suddenly, you're paying for the same labor twice.
- Significant Delays: A failed inspection brings the entire project to a screeching halt until corrections are made and a re-inspection is passed.
- Long-Term Safety Risks: This is the big one. Shoddy work creates hidden fire hazards and electrical gremlins that can pop up years down the road.
Think of it this way: investing in a qualified, licensed electrician for your electrical rough-in isn't just an expense—it's insurance. It's insurance against future failures, protecting your property and your wallet. A true professional gets it done right the first time, ensuring safety and code compliance from day one.
Plan for Tomorrow, Not Just Today
Finally, a huge mistake is only planning for your immediate needs. The rough-in phase, when all the walls are open, is the easiest and most affordable time to future-proof your building. Take a minute to think about what you might want in five or ten years.
It costs next to nothing to run extra conduit or wiring for things like:
- An EV charger in the garage or parking area
- A future hot tub, outdoor kitchen, or patio lighting
- Additional office circuits for a business that's planning to grow
- Smart home or building automation devices like automated blinds or security cameras
Adding these capabilities now is a minor line item. Trying to retrofit them later? That means cutting into drywall, patching, texturing, and painting. It turns a simple upgrade into a messy, disruptive, and far more expensive renovation project. A little bit of foresight here really does go a long way.
Your Electrical Rough-In Questions Answered
Seeing that tangled web of wires snaking through your open walls during an electrical rough-in can definitely spark a few questions. It’s totally normal to wonder what you can—and can't—do during this critical phase. We get these questions all the time from homeowners and developers, so we’ve put together some straight-up answers to help you feel confident about what’s happening behind your drywall.
Can I Make Changes During the Electrical Rough In?
Yes, but you have to be quick about it. That open-wall rough-in stage is your last easy opportunity to, say, shift an outlet a few feet or add that extra sconce you just decided you need in the hallway. If you see something you want to change, you have to tell your contractor right away.
While we can often handle small adjustments on the fly, major changes will likely mean a formal "change order." That can add time and money to your project. Honestly, the best move is to get your electrical plan locked in before any work starts. It’s the surest way to avoid surprise costs and frustrating delays.
What Happens If My Rough-In Fails Inspection?
First off, don't panic. If a rough-in fails inspection, it's not the end of the world, but it does mean we have to stop and fix things immediately. The inspector will give us a report listing everything that doesn't meet the current electrical code. From there, your licensed electrical contractor is on the hook to correct every single item on that list.
Some of the most common slip-ups we see from less experienced crews include:
- Improper Wire Support: Wires aren't stapled to the studs correctly.
- Overcrowded Boxes: Way too many wires have been jammed into one electrical box.
- Incorrect Grounding: The grounding system is either incomplete or wasn't installed the right way.
Once all the fixes are made, we schedule a re-inspection. This is exactly why it pays to hire a reputable, experienced electrician from the get-go—our whole process is built to pass inspection the first time. For more answers to common project questions, you can check out our full list of frequently asked questions.
Should I Plan for Future Electrical Needs Now?
One hundred percent, yes. The electrical rough-in is, without a doubt, the cheapest and smartest time to "future-proof" your property. You have to think beyond today. Where will you be in five or ten years?
Future-proofing during the rough-in is a smart investment. It's significantly cheaper to run an extra wire or install empty conduit when the walls are open than it is to cut into finished drywall later.
Maybe you'll want an EV charger in the garage someday. Or you might consider solar panels down the road. Thinking about adding a dedicated home office? Run an extra circuit now. Talking through your long-term plans with your contractor during this phase is one of the simplest things you can do to save yourself a ton of money and headaches in the future.
At FHP Contracting, we believe a well-planned electrical rough-in is the foundation of a safe, functional, and future-ready building. If you’re ready to start your next commercial, government, or residential project with a team that gets it right from the ground up, request your free consultation today.